

What Is 2FA?
Two-factor authentication is a security mechanism that requires two types of credentials for authentication and is designed to provide an additional layer of validation, minimizing security breaches. It typically involves using a second device like a cell phone to complete the login process. In short, it makes is so a potential thief has to not only steal your password but also has to have access to your phone to log into your account.
Do I Need 2FA?
Passwords are not the most secure means of keeping someone out of your accounts and yet we all use them. There are password cracking programs out there that can be wielded by a 12 year old and can crack about 23% of passwords within 3 seconds. Using strong passwords helps to prevent this but adding 2FA to it makes it even harder since they will also have to steal your phone in addition to guessing your password. Furthermore, if you lose your phone, you can create new 2FA keys thus rendering the ones on your lost phone useless.
Webquarry Supports 2FA
Webquarry supports 2FA in both the client billing system login as well as in the login for the Control Panel for your hosting account. It is not active by default as it requires setup on your phone before you can enable it. Note that we cannot help you set it up since it requires access to your phone. You have to set it up, test it and enable it. What follows is a description of how to do it for both the billing system and the hosting control panel. Our support staff will gladly answer questions about it but due to the nature of how it works, we cannot set it up for you.
Getting Set Up
To use 2FA at webquarry, you need to install a 2FA app on your smart phone. Here are links to a couple of 2FA apps that we have tested. There are likely to be others so feel free to experiment.
- Duo Mobile – Download for both iPhone and Android
- Google Authenticator – Iphone – Android
Once you have one of those installed on your phone, you can proceed with enabling 2FA on your accounts. We will break this down into two sections: one for the billing account and one for the hosting control panel.
Adding 2FA To Your Webquarry Billing Login
Log into the billing system and look for the pull down menu that appears under your name on the righthand side of the menu bar.
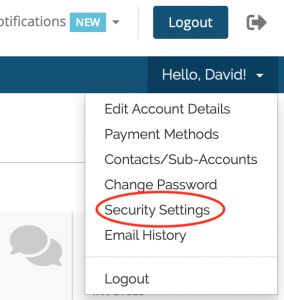
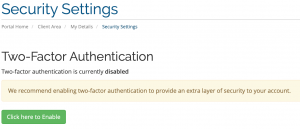
Select the “Security Settings” item from that menu. The billing system will show the current 2FA status (disabled) and invite you to click the green button to setup and enable it.
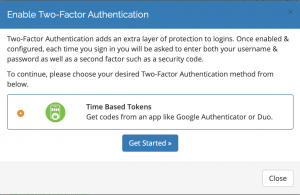
On the next screen that pops up, you can select the “Time Based Tokens” option and click the “Get Started” button.) If we should add other authentication methods in the future, they will also appear here for you to choose from.)
On the next screen that pops up, you will be presented with a QR code like the image below. Open the 2FA app that you installed on your phone and add this login to it following their instructions. In short, you will use your phone’s camera to scan the QR code. Once scanned, your 2FA should report that you have added it. You can name the login anything that you want in the 2FA app. (Do not try to use the sample QR code below. It contains just sample data and will not work for you. You MUST use the QR code that is custom generated for you.)
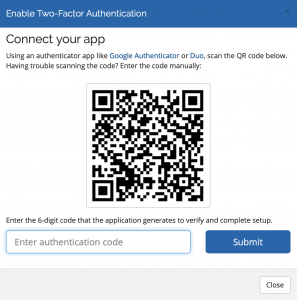
Once you have scanned the QR code and added the login to your phone’s 2FA app, you MUST test the connection. Your phone should be showing you a 6 digit number for this login. This 6 digit number will change every 30 seconds or so. Type the current number into the field and click the submit button. If you have typed the right code into the test box, you will have demonstrated that you have 2FA properly set up on your phone and the billing system will then (and only then) enable 2FA on your account.
WRITE DOWN THE SCRATCH CODE!
Immediately after enabling 2FA, the billing system will display a scratch code for you to use in the event you lose your phone and need to disable 2FA for normal logins. You MUST write this down and put it in a safe place. There is no way to recover it. You can disable 2FA and then re-enable it to generate a new scratch code but that will not do you any good if you are not able to log in due to a misplaced phone, etc. To help keep the scratch code secure, write it down but do not write down what it is for. In that way, it becomes like a house key without an address attached to it. A thief will have no idea what to do with it should they ever come across it.
Make Yourself a Cup of Coffee!
Congratulations! You have just secured your billing account by adding 2FA to it. The next time you log into the billing system, after entering your normal username and password, you will be asked for the 6 digit 2FA code. Consult your phone for the current code, enter it and you will be logged in.
Adding 2FA to Your Hosting Control Panel
Log into the hosting control panel for your web server and click the password lock icon in the menu bar. (If you do not know where the login for your hosting control panel is, see this FAQ entry.)

This will bring up the password screen where you can enable 2FA and/or add security questions to the login:
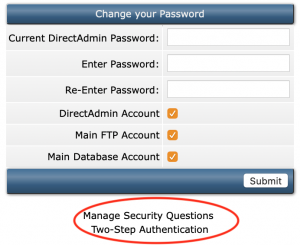
Click the “Two-Step Authentication” link. On the next screen, you will see the current state of 2FA (disabled). Enter the description that you want to appear in your phone’s 2FA app and click the “New Secret” button.
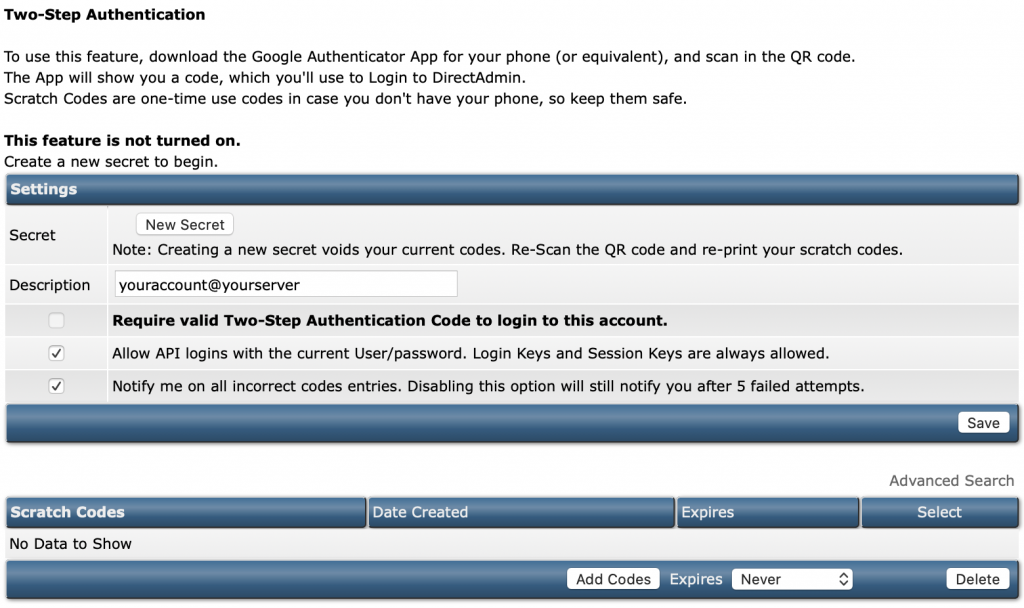
One the next screen you will see a QR code that you can use to add this login to your phone’s 2FA app. Go ahead and add it if you like. The QR code will be available to you in subsequent screens as well.
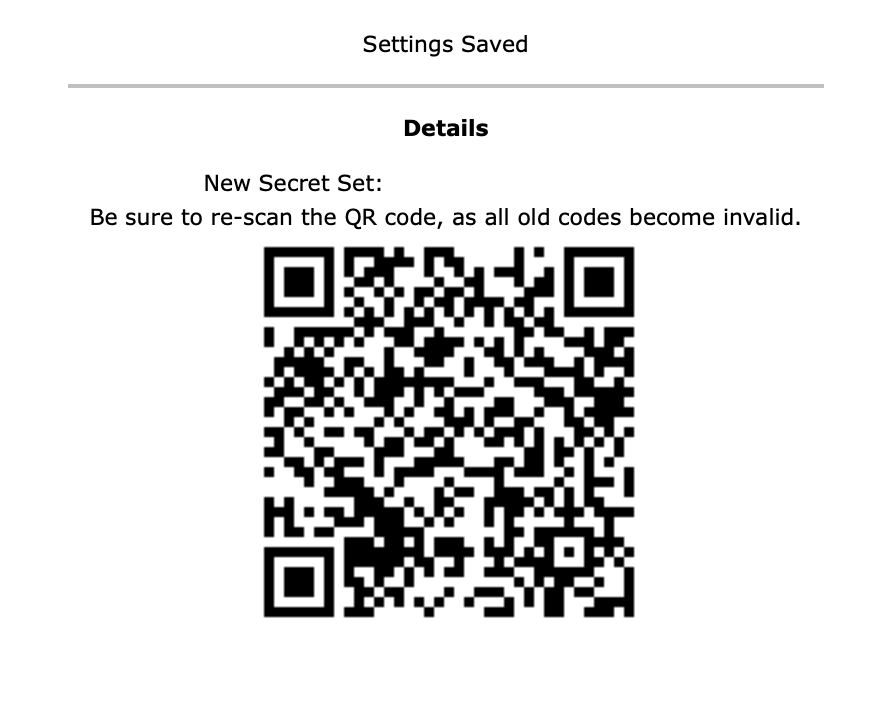
Click the “Back” link at the bottom left of the screen to go back to the previous screen where you will now see your secret key as well as the QR code. Add the QR code to your phone’s 2FA app (if you haven’t already done this) and then use the 6 digit code shown on your phone to test the connection.
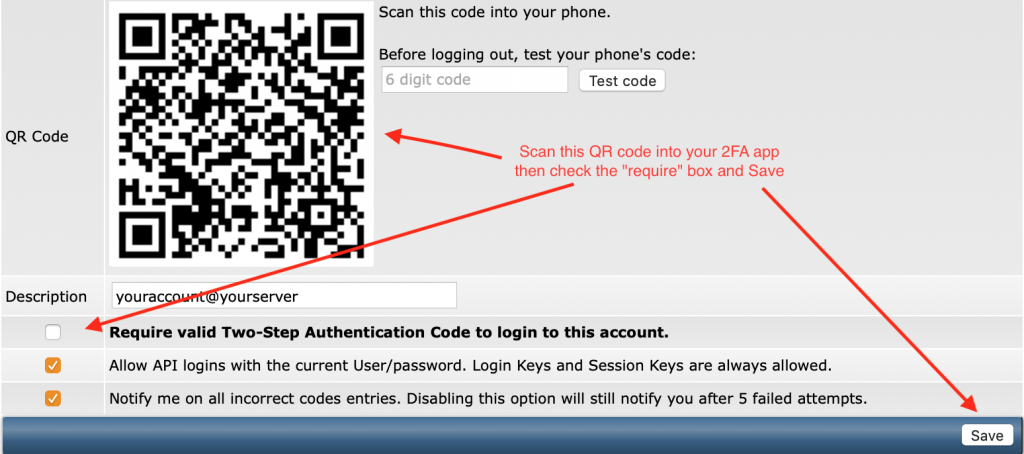
If the test works, check the “Require valid Two-Step Authentication Code” check box and click the “Save” button.
GENERATE AND WRITE DOWN SCRATCH CODES!
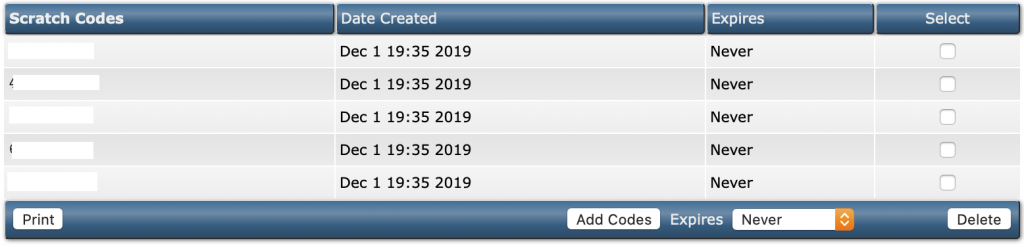
The control panel gives you the option of generating some scratch codes for use in the event that you lose your phone. It will generate 5 of them at a time and you can set an expiration date if you like. Just like the scratch code for the billing system, write these down and keep them safe. The examples above have been whited out. They are not valid for anything. We just didn’t want anyone to accidentally write these down thinking they applied to them.
More Coffee!
You have now successfully added 2FA to your hosting control panel. The next time you log in, you will be asked for the 6 digit code from your phone. Provide the current code and you will be logged in just like before.
Let Us Know What You Think
Thank you for reading this. We hope this was helpful to you. We realize that there are many features of Webquarry that our users are unaware of. We aim to add a few articles that introduce some of the major ones. If you have questions about this or other features, let us know and we will be happy to address them.